
Building a chatbot doesn’t have to be overwhelming. With Brilio, you can create and train an AI chatbot in clear, manageable steps without touching a single line of code.
Brilio simplifies the process. It’s a no-code chatbot builder that lets you connect PDFs, website pages, or custom Q&A lists, and your bot will be ready to answer questions immediately.
In this guide, I’ll walk you through building a chatbot with Brilio step by step. You’ll learn how to train it with your content, test its responses, and embed it on your website so visitors get instant support.
What You Need Before You Start
Before creating your chatbot, it helps to get a few essentials in place. This way, you can move through the setup without interruptions.
- Brilio account – Sign up or log in to create your chatbot.
- Access to your site – You’ll need to drop in the embed code later, so have your website or CMS open.
- Content to train with – This could be a PDF, a couple of URLs, or even a short Q&A you’ve written.
That’s it. With these ready, you can jump straight into building and testing your bot without delays.
Step 1: Sign Up and Create Your First Agent
Once you have the prerequisites ready, the first step is to sign up for Brilio and create your agent. This sets the foundation for everything else you’ll do in the chatbot building process.
Register and log in:
Head to Brilio and create an account. Once logged in, you’ll land on your dashboard.
Start a new agent:
Click Create Agent. This opens the setup screen where you’ll enter the core details of your chatbot.
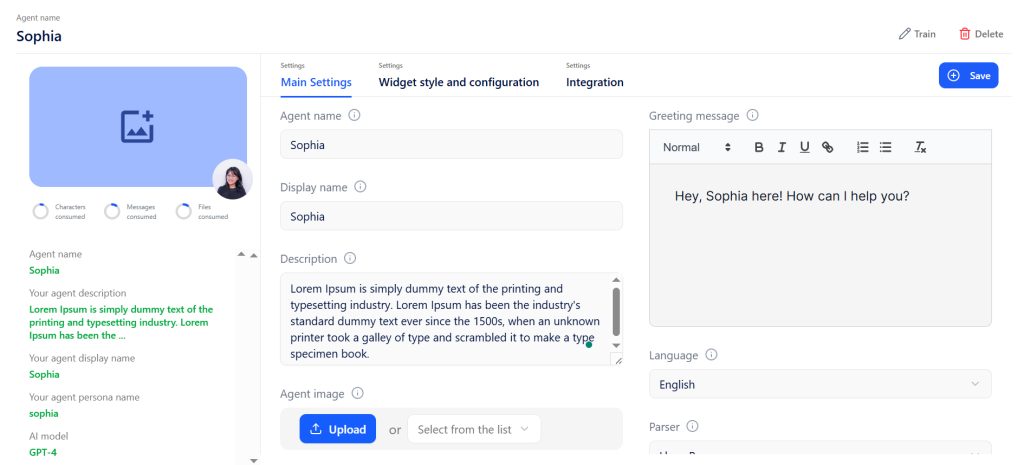
Fill out the essentials:
- Agent name: For your own reference.
- Display name: What users will see when chatting.
- Description: A short summary of what the agent does.
- Greeting message: The first line your bot will send.
- Language & tone: Choose how your agent communicates.
- Characteristics: Define traits or personality style to guide responses.
- Parser: Select a parser (e.g., LlamaParse by default) to handle document inputs.
- AI model: Pick from top providers like OpenAI, Anthropic.
- Avatar: Upload or select an image to visually represent your bot.
- Status: Choose between Private or Active.
Save your settings:
Hit Save, and your agent will now appear in your dashboard, ready for customization in the next steps.
Step 2: Customize the Look and Feel
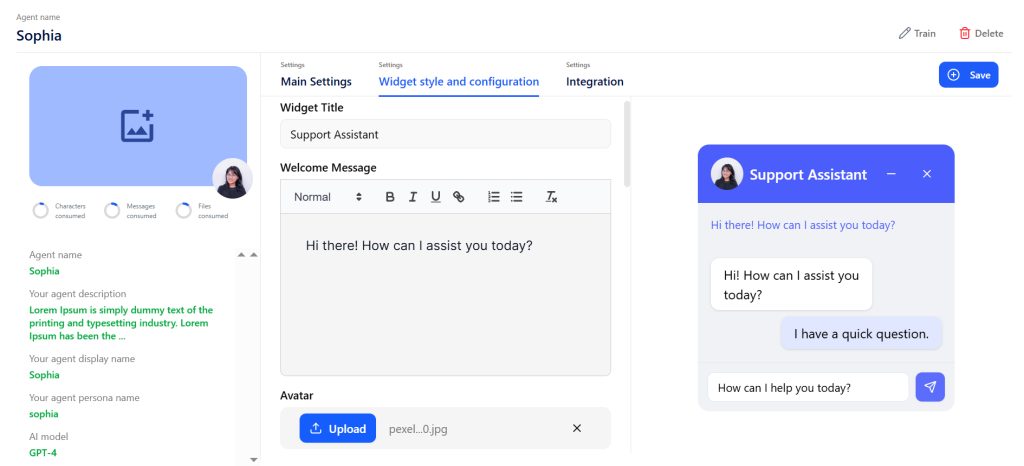
Once your agent is created, the next step is making it look and feel right for your site. This happens in the Widget Style & Configuration tab. You’ll see a live preview on the right, so you can test changes as you go.
Here’s what you can adjust:
- Widget type: Pick slide-in or pop-up.
- Quick questions: Add starter prompts that users can click to begin a chat.
- Color scheme: Match your brand or make it stand out.
- Position: Bottom right, bottom left, top right, or top left.
- Icon or emoji: Choose a visual that makes the bot approachable.
Take a few minutes to fine-tune these settings. When you’re happy with the design, click Save. Your chatbot is now styled and ready for integration.
Step 3: Integrate on Your Website
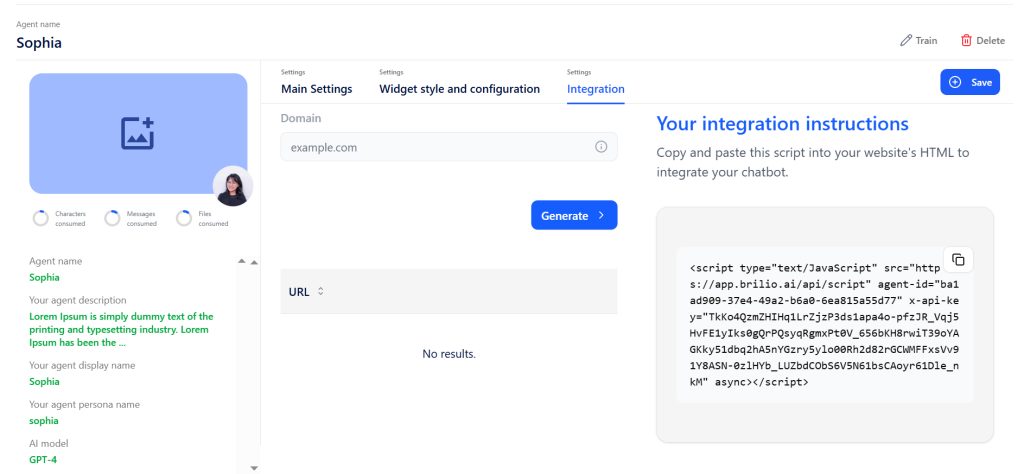
With your chatbot styled, the final step is to place it on your site so visitors can start using it. Brilio makes this simple through the Integration tab.
Here’s how to do it:
- Go to Integration in your agent settings.
- Copy the code snippet provided.
- Paste it into your site’s HTML, right before the closing </body> tag.
- Save and publish your site.
Your chatbot is now live. Open your site in a browser and test the widget to confirm everything works as expected.
Step 4: Train Your Chatbot

This is where your chatbot becomes truly useful. By training it with your own content, you ensure the answers reflect your brand, product, or service. Brilio makes this process simple with powerful training options:
1. Documents
Upload PDFs to share your knowledge bases, product guides, or manuals. Brilio will process the content so your chatbot can give accurate, relevant answers.
2. Websites
Add your website or specific pages. The chatbot will crawl and understand the content so it can respond with information directly from your site.
3. Q&A
Manually add question-and-answer pairs. This is useful for handling precise queries like policies, pricing, or instructions in your preferred wording.
4. Databases (Coming Soon)
Connect live databases so your chatbot can pull real-time answers, like product availability or customer data.
5. YouTube Videos (Coming Soon)
Train your chatbot with video content, so it can summarize and respond based on your video explanations.
Step 5: Test, Refine, and Go Live
After training your chatbot, it’s time to ensure it works correctly and provides accurate responses.
1. Test in Chat History
- Start new conversations and ask common questions.
- Note any answers that need improvement.
2. Refine Content
- Update Q&A pairs or documents to fill gaps.
- Adjust tone, greetings, or quick questions if needed.
3. Preview the Widget
- Check the live preview in the Widget Style tab.
- Adjust colors, position, and quick question prompts.
4. Go Live
- Copy the code from the Integration tab.
- Paste it into your website HTML before </body>.
- Save and publish. Your chatbot is good to go to help visitors.
How Much Does It Cost to Build a Chatbot With Brilio?
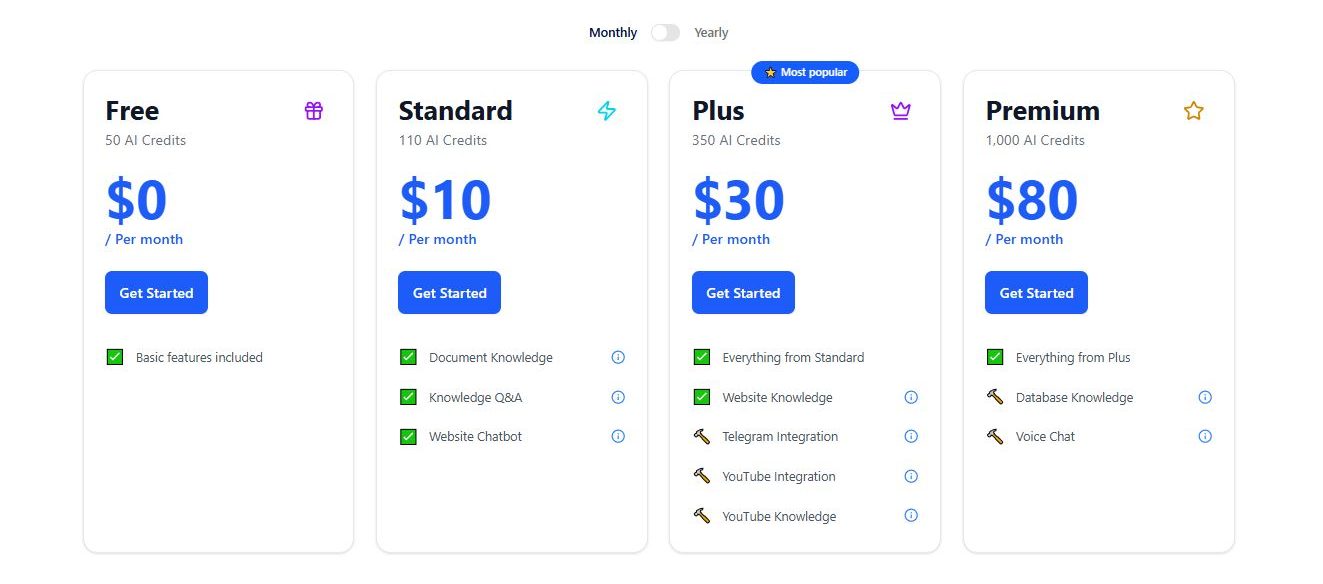
Brilio offers monthly plans to fit different needs and budgets. You can start building a chatbot for free with the $0 plan. Paid plans begin at $10/month and scale with features and AI usage, so you can upgrade as your chatbot grows.
Plans at a glance:
- Free – 50 AI credits, basic features, $0/month
- Standard – 110 AI credits, document and website knowledge, $10/month
- Plus (Most Popular) – 350 AI credits, integrations with Telegram and YouTube, $30/month
- Premium – 1,000 AI credits, database knowledge and voice chat, $80/month
You can pick the plan that matches your usage and scale up anytime.
Why Choose Brilio Over Other Chatbot Builders
Brilio is built for anyone who wants to create AI chatbots without writing a single line of code. It works well for small to medium website owners, agencies, and teams who need flexible and easy-to-manage bots.
What sets Brilio apart:
- Multiple training options – Teach your bot using PDFs, websites, Q&A pairs, or live databases.
- Full customization – Match the chatbot widget to your brand and preview changes instantly.
- Top AI models – Choose from OpenAI or Anthropic models for reliable responses.
- Credit usage insights – Monitor how your AI credits are spent and optimize usage for cost efficiency.
- Flexible subscription control – Upgrade, manage, and scale your plan easily as your chatbot grows.
- Simple setup – No coding skills are required, so anyone on your team can get started.
- Risk-free start – Begin with 50 free AI credits without needing a credit card.
With Brilio, building, training, and managing chatbots is faster, easier, and more flexible than with traditional tools.
Get Started With Brilio for Free
Create, train, and customize your AI chatbot without coding. Start with 50 free AI credits and explore all the features at your own pace.
Get Started With Brilio for Free and launch your chatbot today.
FAQs
What is Brilio and how does it work?
Brilio is a no-code platform to build AI chatbots. You create an agent, train it with documents, websites, or Q&A pairs, customize its widget, and embed it on your site.
Do I need coding skills to build a chatbot with Brilio?
No. Brilio is fully no-code. You can create, train, and deploy chatbots without writing any code.
How do Brilio AI credits work and how many do I need?
AI credits are used whenever your chatbot processes content or responds to users. The number depends on file size, scraping depth, and usage. Plans start with 50 free credits.
Does Brilio support multiple languages for my chatbot?
Yes. Brilio supports English, Spanish, French, German, Chinese, Japanese, Serbian, Slovenian, and Russian.
How do I embed my Brilio chatbot on my website or app?
Go to the Integration tab in your agent settings, copy the embed code, and paste it into your site’s HTML just before the closing </body> tag.